Monday, February 17, 2014

My Most Popular Post Challenge

I was challenged to repeat a post of mine that received the most views and to mention the number of views it received. My most viewed post was from my Anniversary mini album that I posted in September for the Flamingo Scraps Blog. It received a total of 144 views. Thanks everyone!! I have included this post from September 24, 2013 below. Now, I am going to challenge Cathy Derouche to post her most popular post!


                                Happy Anniversary To Me

It's hard to believe, but tomorrow I will be married for thirty-seven years. Thirty-seven wonderful years with my one and only. I met Rick when we both worked at JC Penney. Honest to God, the very first time I saw him, I told one of my friends, that also worked there, that he would be my future husband. Rick would come over to my department at the end of the evening and make small talk . One day he hung around after we closed and said "When are you going to go out with me?" and I responded "When are you going to ask me?" We had our first date the end of January, he asked me to marry him in May, and we married in September. I have had the most wonderful, blessed life with Rick. Looking back we both say our early years with raising our kids and making ends meet, were some of our best days and happiest moments. I found a sign and we have it hanging in our living room. "If I had my life to do all over again, I would meet you sooner, so I could love you longer" 
 
When I saw the Echo Park "Beautiful Life" paper collection in the Flamingo Scraps online store, I knew I wanted to make a small mini album for our upcoming anniversary. I wanted to keep it simple with lot's of room for pictures and journaling. I started with a 12" x 12" piece of designer paper and cut it down to 9.25" x 11". On the 9.25" width I scored it at 2.50" and 6.75". On the 11" width it is scored at 5/8", 7", and 7.75". After trimming away both two opposite ends on the 5/8" score line and removing both sides starting at the 7" score line to the ends, I rounded the corners of both opposite flaps and folded the center section together using the scored lines, and then brought the 5/8" tab up pressing firmly after applying adhesive.
 
 
The liners for the outside and inside cover measured 4" x 1/2", 3" x 4", and 4" x 6 1/8". 


For my inside pages I used the coordinating solid card stock measuring 12" x 12".  I trimmed five of these to 7" x 9.25" and then scored them on the 9.25" width 2.50", and 6.75". On the 7" width at the 5/8". My liners measured 4" x 6 1/8" and followed the same instructions as the cover.


 Once assembled I used a 1 3/8" circle punch and cut a half circle out from each page for each 4" x 6" mat that was inserted into each pocket.


I inked the edges on all of the liners and mats. On each mat I used a small double hole punch and tied a bow using several pieces from the seam binding sampler. I used my Bind It All and bound the mini with a brown coil.
 

I used the plentiful supply of coordinating stickers to decorate the mini using mounting tape and then one magnetic closure for the cover.

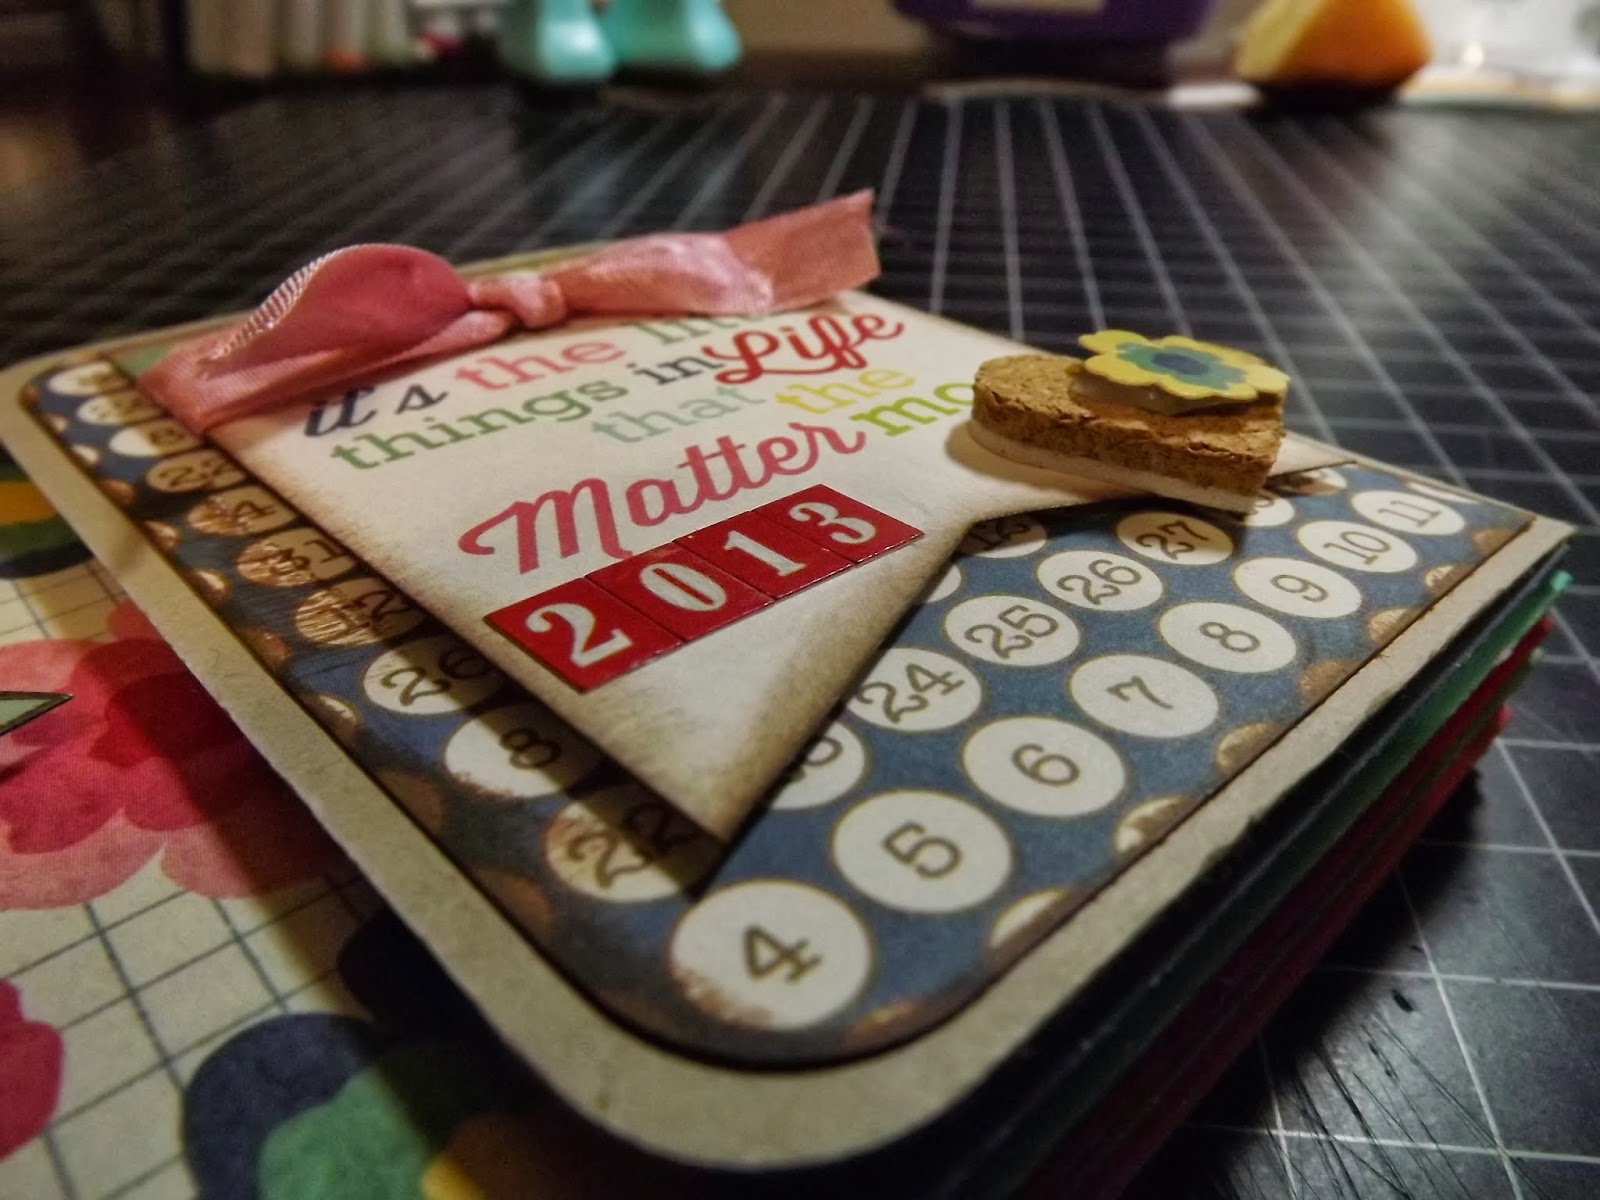


This was a very easy, non fussy, non complicated, but sweet album to make. The papers were so pretty that other than inking the edges using my favorite PrimaDark Rust chalk ink, seam binding, coordinating stickers, Heidi Swapp Banners, and the Fancy Pants Cork Hearts, the paper collection spoke for itself.
 
I hope you have enjoyed visiting my blog today. While you are here, I would also love for you to subscribe by email. Also I would love for you to follow the Flamingo Scraps Blog here, to like their Facebook page click here, or if you are interested in buying this paper collection, or anything I used to make this mini, you can find ithere in the store.
 
HAPPY SCRAPPIN!
 

Thursday, February 13, 2014

Valentine Card

Last night I was going through my blog, intent on cleaning things up. Earlier I found a couple blog entries that were pending to be posted. One of them was for the Cuttin and Stampin Design Team I was on in 2013. I found this cute Valentine card I created in December. It was made using the "Love Struck" Paper Smooches Stamp set. You can buy these stamps and other scrapping items here in the Cuttin and Stampin online store. My card base is my favorite, a top fold card using "Naturals White" card stock from Stampin Up and VersaFine Onyx Black from Tsukineko, my favorite go to black ink for stamping. Enjoy!!


Happy Scrappin.............Cheryl


Wednesday, February 12, 2014

George's Penguin Valentine Card Box

Okay...two Valentine Card Boxes are now history. One for Madison and another for George. So sad that Alex's school no longer have Holiday parties. These young years pass way too fast. Who would think I have a thirty four and thirty year old? Where have the years gone? With George's box, it was done the same way as Madison's. I covered a garbage bag box I was given with black paper and went from there. I am not sure which one I like better the Penguin or the Owl. You can see the Owl here on my blog in an earlier post. Enjoy!


Happy Scrappin.........Cheryl


Monday, February 10, 2014

Madison's Valentine Card Box

My daughter brought over a shoe box this weekend and asked that I make my five year old Grand, Madison a Valentine Card Box for her party at school this Friday. Actually she brought over two. One was for Madison's best friend George. It has been years since I have had to make one of these, but if it involves paper, inks, and glue and I am all over it! Here is the first box I made. I am just now starting on George's. This was a lot of fun to make. I am sooo thankful and blessed to live close to my family once again. Enjoy!


I started off with a cut flowered shoe box. It was so cute already, I hate to cover it up


Added a few layers of border cut dies


Added a layer inside the box to make it all pretty for when the box was opened. Added a heart punch for the nose. I covered a foam heart with paper, cut it in half and used it for the wings with a little bling to the wings, Not sure if an owl has blue eyes or not. but this ones does. 


I totally messed up on the eye lashes. I had the box turned around for me to get to the eyes easier and never thought about the direction of the lashes and it was too late to go back and repair. Too many layers on top of the thin red wrapping paper. I would have had to totally start from scratch on the front of the box. Maybe these five and six year olds will never notice!


Added a bow and her name with some glitter alphabets and her box is finished.


Now onto box #2!! 

Happy Scrappin...........Cheryl

Sunday, February 2, 2014

Cards For My Momma

My sweet Mom is a huge card lover. She can spend hours in the Hallmark store looking through dozens of cards and reading each one until she finds the very one meant for her. I am trying to make her a small variety of cards to have on hand so she will not have to run out to the store as often. Like many of our Mothers and Grandparents, she sends out several cards each month and several dozen around a Holiday. Here are a few I made for her today while everyone was watching the Super Bowl. I got the idea for these cards from my friend France Martin. Here is her YouTube video showing how to make these pretty cards. Enjoy!


Happy Stampin..........Cheryl


Monday, January 27, 2014

Attempting a Tag


Hi this is Cheryl. Today for my post for Flamingo Scraps today I decided to attempt to make my very first tag. On Saturday I went to the Rubber Stamp Show here in Plano and the last booth that I visited was the one for Ranger. I could have camped out all afternoon, but I had my very tired Grand with me and she was ready to go. So I hung around as long as I dared and watched bits and pieces of a project or two and then we left. I love Ranger products and love Wendy Vecchi's line most of all. Her products are totally earthy and feminine, but the type of projects she makes are totally foreign to me. I am a card maker first and then a scrapbooker second.  Making tags, 3D projects, and Mixed Media is totally out of my comfort zone. But, I took notes, picked up a few things, and took a shot at it. I really don't know what anyone does afterwards with these tags. Maybe use them for a book marker? Do people collect these as someone would a ATC card? Oh well, here is my tag. There were many steps to make this, but it was really a lot of fun too! It has me wishing I had a small piece of canvas to play with now. I might get to like this! Enjoy!


Thank you for visiting my blog today. Please also visit and "like" the Flamingo Scraps Blog here. We have a lot of fun as we adventure with our inks, stamps, and papers.

Happy Stampin.........Cheryl

Monday, January 20, 2014

Thank you, thank you!

I am soooo excited. My friend gave me this nice roll around cart. She is doing her scrapbook  room over and could no longer use it, but I sure can. The six drawers on the right are 13" x 14" each. Not sure what will end up being on/in it, but I will be happy to make it work.The three on the left are nice and deep. Thinking this might be something I tote to a retreat in the future. I truly have no room for it in my craft room, but will find a spot. Thank you Melanie!


Friday, January 10, 2014

Spring Is In The Air!

Exciting news......I wore flip-flops outside today for the first time this winter. I also have noticed that it is not as dark in the afternoons. Today was an exciting 66 degrees today. It is expected to be in the 60's and 70's for the next week. I know ol' man winter has not left our area yet, but it won't be long. Yeah for warmer weather!

Monday, December 30, 2013

Weekly Challenge #51


#51
Challenge: Anything Goes Using Leftovers

December 24th - 30th, 2013


Hi, this is Cheryl. I am hoping everyone had a blessed Christmas. I could not have asked for a better Holiday. We had a wonderful day with our girls and lot's of yummy food to eat. Santa was good to us all too.

For today's project we were instructed to use any of our leftovers from previous projects. I chose to use my well loved Paper Smooches Winter Groves stamp set and some random papers from my leftover stash. This was a great way to get more miles out of our papers and embellishments. I tried to think ahead and use what I had for a Valentine Card. I hope you enjoy my card!


Thank you for visiting my blog today. I would love for you to also visit the Cuttin' and Stampin" blog here. If you wish to purchase the stamp or papers used, please visit their Facebook online store at Cuttin' and Stapmpin' Scrappy Supply Store  We would also love for you to like their group on Facebook here.

Happy Scrappin...........Cheryl


Please make sure your creation post has a link back to Cuttin' and Stampin'. 


Thanks for playing along!  We will be announcing the winners on January 3, 2014.


Sunday, December 15, 2013

Cuttin" and Stampin" Weekly Challenge #49


#49
Challenge:Anything Goes with a Pocket

December 10th - 16th, 2013

Hi, this is Cheryl. Today I am posting my creation with Cuttin' and Stampin". All of the Designer Team was given the Simple Stories Snap December Documented paper collection for this week's challenge and were instructed to use some type of pocket for our project. For Christmas my husband and me give gift cards to our kids and I am always looking for some type of holder for their stocking.

I started with a solid kraft card base measuring 4.25" x 11". This was scored at 1.50" and 7".  Fold and burnish on both score lines. Add a thin line of liquid line of glue to both sides only on the 1.50" scored line and fold over and press. Do not use a tape runner. Anything you insert in this pocket will continue to get caught in the glue. The liquid glue will firm up much nicer. From there I cut two pieces of a December Documented paper at 4" x 3 7/8" and another at 4" x 1.50". On my example I cut down one of the journaling pieces and used it in place of the second smaller piece. I inked my edges and adhered them to the card front. I cut another coordinating piece at 4" x 2" and used a border punch on one side. From there I cut the strip down to a 1" piece, inked the edges and adhered it to the bottom 1/2" area of the non-folder end. Apply your adhesive to the middle of this strip only in order to leave room along the top edge to tuck your tree and gifts under. From there I used the Paper Smooches "Winter Groves" stamp set and stamped the tree image on another piece of coordinating paper, fussy cut it out, and adhered it to the front of my card, tucking the base of the tree under the edge of the punch bordereed strip. I also used three colors from the journaling pieces and stamped and fussy cut my gifts. I then staggered the heights of these gifts under the strip edge. From there I was not sure if I wanted to add a ribbon on the bottom of this card or not. I took a picture of all three choices. I think I liked it best with just using a bow made from Baker's Twine. This nice paper collection has many small journaling cards that can be used in place of a gift card. I have taken pictures of both options. .


I used the clear Wink of Stella pen on the tree and gifts


My finished gift card holder. Enjoy!


Wishing I had a ribbon half as wide, I think I would have liked it better 


This ended up being my favorite cover for the card. Enjoy!


Thank you for visiting my blog today. Please don't forget to check out the Cuttin' andf Stampin" Blog. If you wish to purchase the Simple Stories Snap December Documented paper collection, the Paper Smooches Winter Grove stamp set, or the Wink of Stella pen that I used, please visit their online Cuttin' and Stampin" Scrappy Supply Store here.  We would appreciate it if you will also "like" and follow their Facebook page by clicking here. 

Happy Stampin...........Cheryl

We would love for you to participate in this weeks challenge. To do so please make sure your creation has a link back to Cuttin' and Stampin".  Please click HERE to link your project. 
This weeks winner will be anounced on December 20, 2013


Thursday, December 12, 2013

Merry Christmas Snowman Family


Hi this is Cheryl. Well, I think Texas has finally thawed out. Our schools were closed for three days. Most businesses lucked up with it hitting Thursday night and were only closed or disabled on Friday. The Fort Worth area had three to four inches of pure, solid ice on our driveways, local streets, and highways. It was pretty challenging for any experienced driver. I never moved my car until Tuesday. Today, six days after the winter storm, most yards are still covered with snow and ice, but thankfully the roads are clear.

For my Designer Team project today with Flamingo Scraps, I made a family of Snowman treats. Each one can hold a snack size piece of candy. I used the Echo Park "Merry Christmas" paper collection. As you know I have a stock of these papers. So beware, I have not gotten tired of it yet! I also used my awesome We R Memory Keepers Envelope Punch Board. I just love using this and everyday I am discovering new ways to use it other than making an envelope. For the month of December in the online store this is on sale for only $14.99!! What a nice stocking stuffer!  

To make these sweet Snowman, there is a lot of cutting, small pieces involved, and a long list of directions. These instructions sound like it is too big of a project, but once your papers are all cut, it goes together fairly quickly, and they are soooo cute! You will end up with many tiny pieces so I would suggest that you place a small dish on your work surface to hold these.


You will be using many of the scrap pieces that are punched and normally thrown away. Use this small dish to hold the tiny piece until you are ready to use them. Both the Mom & Dad are the same size and the two kids are also cut to the same smaller size. 

Start off with a piece of 8.5" x 11" white cardstock. Use your thickest paper on hand. Cut one piece at 4.25" x 11" and another at 3" x 9".  From there cut these two pieces in half. You will end up with two larger pieces measuring 2 1/8" x 11" and two smaller pieces measuring 1.50" x 9". Score the larger two pieces at 5" and 6" and the two smaller pieces at 4" and 5". Get your Envelope Punch Board and line up each piece at the 2 1/8" mark and punch. You will do this measurement and cut on all four ends of each piece. Take a light brown ink and carefully ink the edges and score lines of all four pieces.


Now you will need a piece of black card stock. You will keep every trimming from this paper when using your score board. These tiny scraps will be found under your board. Place all of these in your dish and save them. This is a great time to get out and use your scrap black pieces. You need to cut two squares measuring 2" x 2", and two 1.50" x 1.50" squares, two 1/2" x 2.50" rectangles, and two 1/2" x 2" rectangles. The picture shown below shows all the measurements the same size for all four snowman. Once I decided to make the two kid snowman smaller, I failed to take an updated picture.


Using your Envelope Punch Board again, take all four squares and round two corners only on one end using the built in corner rounder on your board. Taking the same piece that has it's corners rounded, insert the width of this under the board, eyeball the center, and punch in the middle of each square on one end only. You should now have four squares that have two rounded corners and a middle punch. Moving onto the four retangle pieces insert all four ends into the corner rounder and round each end. Remember to keep all of the tiny trimmed pieces of the black papers.

Now we need to make a band for their hats, (if desired) a strip of paper over these bands, and their scarves. For the larger Snowman's band on the hat, I cut four 1/2" x 2" pieces and for the smaller size I cut four 1/4" by 1.50" pieces. Then four 1/8" x 2" pieces and four 1/8" x 1/2" pieces for the thin strip to lay on the middle of the hat band. For the scarves I used my crimper so I had to cut my piece 1/4" larger to accommodate for the shrinkage. Your crimper may effect your papers differently. I would cut them slightly longer than needed until you know the length needed. For my scarf pieces I cut the larger snowman piececs 1/2" x 2 1/4" and cut three total for each snowman. (six total for the large snowman)  For the smaller snowman I cut again six total of pieces measuring 1/2" x 1.75". For all of the scarves I used a piece across the neck in the front and back and then the third piece was tapered at one end and then ribbon cut on the end of each scarf. If desired you may ink the edges of all pieces.


I also used random papers and punched out buttons for their chests and used an orange paper and cut a longer triangle for their noses. The tiny black pieces that you have collected will be used for their eyes and mouths. I added two ribbon bows to the two girls hats and a holly leaf to the boys hats. 

To assemble score well on the two score lines, but don't fold. Leave flat for now. Start with the snowman of your choice and adhere the band of paper around the middle of the hat on the front side only. Layer this with the narrow strip. Take the top edge of your snowman and adhere just below the hat band, making sure these two pieces butt up to each other. Take one of the rounded black pieces and layer/adhere it just below the band again making sure it butts up just under the hat band. This will be adherred over the top of the snowman, covering up the top edge.  (You will use the other oval hat piece at the end of making each snowman) Now look in your bowl of tiny pieces and get two of the smallest scraps and adhere for the eyes. Take one of the largest pieces from punching the center of your hat and adhere it for the mouth. Cut a small orange piece for a nose. The face is complete. Now take your scarf pieces and adhere the tapered end to the middle of the neck and the end of this piece toward the middle of the bottom right side. Save your third scarf piece for later. For my buttons I used a 1/4" and 1/2" round punch. If desired you may add a bow to both girl hat bands and a holly leaf to the boys hat bands. The front of your snowman are complete! Now turn the snowman over and add some strong adhesive between the 1" scored lines and attach a treat of your choice. Add more adhesive to the bottom of the snowman edge, the same side the candy is attached. Flip the snowman back over and fold up on the scored lines and lining up both notched punches and adhere well.  Now we will decorate the back. Take your hat band and place it just above the adherred edges and then add your 1/8" strip to the band. Next take your oval rectangle and adhere it just below the hat band, making sure from the front side the back edges are not showing. From there add the back of the scarf and you are done! Are these not just adorable? I love mine. I am thinking of making another set, but adherring them to chipboard for strength and posture. I might even add a layer of Modge Podge to keep it from being damaged from being handled. You could also bling these up really cute too. Tons of ideas in making these. One last thought I had was to actually punch out the circles on the chest and add a small tea light instead of the candy. That would be really pretty for a mantal or table. Oh well....my mind is going crazy with ideas! 

Here are my sweet Snowman. I think they turned out pretty stinking cute!


The back view


A couple close up views


I just love them! Enjoy!!


Thank you for visiting my blog today. I would appreciate it if you would leave me a comment below. If you would like to do some online shopping with Flamingo Scraps, you may visit their store here, and of course they would really appreciate it if you would "like" and follow them on Facebook here.

Happy Scrappin............Cheryl