Wednesday, July 31, 2013

I have had a blast!


Today is my last post as a Guest Designer with Flamingo Scraps. I have had a blast this month and I thank Suzanne so much for the invite and privilege to create along with her Designer Team for the Flamingo Scrap "Christmas In July." For this project I used the new "Winter Fun" collection from Carta Bella. I love the unexpected cranberry being used along with the pretty blues and creams. Really nice winter colors.

 
These papers remind me of winter, frost. and snow. I knew when I received this months
 kit that I wanted to do something with a snowman. I started off by stamping the three snowmen
 from the Flakey Friends stamp set.
 
Using a waterbrush and ink I lightly colored in the head ware, scarfs, and stick arms.
 
 
Using the Spellbinders Heirloom Ornament Dies, I cut each snowman using the 4th largest die.

 
Before removing it from the die, I lightly shadow inked all the area around the snowman leaving a pretty white framed border. 
 
 
I then used a liquid glue and marble glitter to fill in the snowman's head and body and let it dry.
 
 
 From there I cut three small rectangles of the coordinating papers and attempted to have a slightly different template using the same sized papers for each card.
 
 
I also placed the solid blue paper in an embossing folder for extra texture and interest
 
 
To finish the outside of each card I added three different sweet winter verses and matted them using a punch and more of the coordinating designer papers.


Don't forget the most important part. Always sign and date the back of your creations.
 
 
I hope you enjoy my cards!


Well, this closes out Flamingo Scraps "Christmas in July." 
Suzanne, the Designer Team, and guest Designer Team all hope
you have found some needed inspiration to get you started on your Holiday projects. 
Please visit and "like" the Flamingo Scrap Facebook page here.
 
Making these cards were "snow" much fun! lol
  Happy Scrappin!


Friday, July 26, 2013

Day twenty-six and counting......

Oh joy. Only five more days until I can post my last few projects for Flamingo Scraps. I just finished my first project for the 31st and now onto the next one. Make sure you check back each day to see what the gals are posting. A lot of fun projects and needed inspiration just waiting on you!

Monday, July 22, 2013

Today's Post on Flamingo Scraps

In the middle of cleaning my scrapbook room......again! I just met a new friend online. She lives just a few blocks over and we are wanting to get together to scrap, but not with my room looking like it does.  Soooo I am working away. I know it will never be 100%, so I will have to be content when I can halfway see the floor and desktop again.

Have you been back to Flamingo Scraps today? Erin Reed has posted some adorable Christmas cards. You have to go to see them here!  Don't forget I will be closing out July with another project using the yummy "Winter Fun" paper collection from Carta Bella. Love these papers! I am trying to image winter with mid 30's temperatures with the crisp cold and frost. It sounds wonderful right now in our hot, dry Texas heat. Expected to be over 100 every day this week. But, I am so thankful to be able to live close to my two daughters and Grands.  Life is good!

Saturday, July 20, 2013

Getting Sketchy

Okay guys....you need to go back and check out Flamingo Scraps again. Melissa Williams has posted another "Getting Sketchy" sketch for us girls to play with. Come on over and see what we did!

 
 I wanted to continue using more of my delicious stash of the Traditional Merry Christmas  collection from Echo Park. I had tons of the papers leftover from my first projet and didn't want to see any of it not being used. I cut five 3" x 3" squares from the collection of designer papers, matted them on the red designer paper. I pieced together the Christmas ornaments from the Merry Border Strip and some of the green designer paper to make the photo mat with the ribbon bow. I also used more of the numbers from the Alpha Stickers, and a variety of snowflakes from the Element Sticker sheet and mounted them all on the brown paper on the flip side of the Jolly Stripe paper. Along with a few diecut Christmas ornaments and some twine, the page was complete. Fun fun! I still have tons of paper left, but I have used all of my 12 x 12 papers from the collection, so it looks like a few Christmas Cards or Tags will be made using what I have left.
 
 
Enjoy!


Tuesday, July 16, 2013

Oh....I Am So Excited!

I am soooo excited! I was recently asked by Suzanne, the owner of Flamingo Scraps if I would like to be on her Guest Designer Team for the launch of her online stores "Christmas in July." I don't think she had time to take her next breathe when I said I would be thrilled! I initially met Suzanne from ordering scrapbooking supplies through her previous Ebay Store and now we are great friends on Facebook. So there was no hesitation or delay in me saying "YES."

For our projects the Guest Designer Team would be given one of the two Echo Park "Merry Christmas" paper collections. It would either be the Brights collection or the Traditional collection. I didn't care either way, but was tickled to receive the Traditional collection. I love to start my Christmas shopping in July and the last year or so July has been the time when I started the process of making my numerous Christmas cards. Also many of our local stores are now getting their Christmas displays and decorations out for sale, so the timing on this is perfect. Anything that will get me motivated is a bonus!

For my project I used a 12" x 12" canvas. I started off by using a layer of Gesso with on old paint brush over the canvas and let that dry overnight.


I then cut a 2" strip off each piece of the double-sided 12" x 12" papers and cut them again in a variety of sizes from 5" down to 1/2". I used twelve rolled strips for the tree and one additional square piece for the trunk. Using a narrow paint brush I rolled each piece of paper around the paint brush barrel to get it curled tightly. I then removed it from the brush, and then keeping it tightly rolled, I glued the back edge of the paper closed. I then laid all pieces on top of my canvas in the form of a Christmas Tree and glued them down.

Once it was complete, I laid my full sheet of designer paper over the top of the tree and using my fingers, I found the three edges of the tree and using my craft knife I cut through the paper from the middle of the tree from the top down to the bottom and then along the bottom edge of the base of the tree. I then opened the paper and draped and secured both flaps down to the canvas using two brads to secure the paper.
.


I layered two chipboard snowflakes and used another brad to secure them together from the Echo Park Holly Jolly Christmas Decorative Brads pack. (For some crazy reason, I cannot get this pic turned correctly :) )


Afterwards I cut several squares and rectangles to make the gifts and topped them off with several pieces of narrow ribbon.


 I cut the 2013 using two of the circled numbers from the paper collection. I also cut out four circles of chipboard and glued two of them together under both numbers for a 3D effect. On the "Dear Santa" list I used the sticker alphabets and numbers and then hand drew three lines for the list.


I scattered several of the chipboard pieces from the echo Park Layered Chipboard Season's Greeting pack on the canvas.


I added red Stickles on the red berries and then lastly used a dark brown ink to edge the gifts, the green drape on both sides of the tree, the 2013, and the four sides of the canvas.


I really enjoyed working on canvas for this project and I LOVED playing with this nice collection of papers, chipboard pieces, and brads. I had tons of  papers and goodies leftover and will use more from this collection on my next post, which will be on July 31st. Please don't forget to check out the Flamingo Scraps blog here to see everyone's creations. Donna Sullivan posted her project yesterday. You can check it out and follow her blog here.

I hope I have inspired you in getting started on YOUR Christmas in July!  Thank you!

Flamingo Scraps

My project for Flamingo Scraps will be live at 8:00 AM! Come back and check it out! lol

Monday, July 15, 2013

School Supply List Already?

One of my friends was just mentioning that she had received her child's school supply list for this year. Really? Is it that time already? It seems like summer vacation has just started and now they are talking about a school supply list? The other day I went into our local Hobby Lobby and they already have fall decorations out and were getting set up for their Christmas display. What? One good thing about school starting back is knowing that cooler temperatures and Alabama Football are just around the corner. We moved to Texas last September and this is my first summer living out West. I know last summer in Fort Worth it was over 110 degrees for almost forty five days in a row. So far we have not experienced anything like that yet, but we have had several days around 105, plus we still have August to get through.. My sister is camping in Iowa this week and she said it has been chilly in the evenings. It was around 47 degrees when they arrived at their camp grounds. Oh man.....that sounds fantastic!

We are slowly working on our yard and planting some of our favorite flowers and trees. This is something my husband and I love to do. We lived in our house in Alabama for five years. When we bought it new, we asked that they give us a credit on our landscaping budget. We already had an idea of what we wanted in our yard. After four years our yard was finally complete, but here we go again! I think my most favorite flower in our yard are Coneflowers. Very simple, but beautiful. This year I found a white variety that we planted. We also found some Black-Eyed Susan's. We have never grown these, but my sister does and hers are just beautiful.


I have been on a roll this month making cards. I am the host for a monthly card challenge on one of my Facebook groups. This month our challenge was to make a one layer card. I have never made this type of card before. I have always preferred, like my bed, to have lot's and lot's of layers on my cards, so this was a real challenge for me too. Once I had my card finished, I loved it so much that I ended up making around eighteen of them but using different verses. This was also the first time that I used  watercolor paper and an aqua pen. I really loved working with the watercolor paper. The ink went on so smooth without much distortion to the paper.
 
 
July is also a busy month for birthday's around our house. Mine, my husband's, my Mom's and several wedding anniversaries. I received several beautiful handmade cards this year. One card in particular my Grand said to me "Gamma, don't you wish we could make beautiful cards like this?"
 
My Mom's birthday card
 
My friend's birthday card
 
Well, time to get in bed, I need to stay off Facebook more and remember I have a blog. The poor neglected thing! It has been a while since I have thought about getting on here. Hoping not to treat it so bad in the future.  Bye for now! :)


Thursday, February 14, 2013

Valentine's Day

Today was Valentine's Day. For Rick and me, it is one of our most favorite days. He told me he loved me for the first time today, thirty seven years ago. Another special day for us is Mother's Day Eve. He asked me to marry him that night, and then the most important date was September 25th, 1976. The day we said "I do." Rick and I never exchange expensive gifts on any Holiday, but we have always enjoyed our cards we exchange. I cringe when I look and see what he spends on my cards. But, Rick always says not to look and just enjoy the card. Typically I always get two. One is marked "open this one first". It is always a funny and humorous card. The second card marked"open last" normally comes with a tissue because I know I will be crying soon after reading it. Rick prefers not to shop, but he will spend all the time needed until he finds these two special cards. He is a Prince among men. His two daughters and Grands think so too. I was blessed when I met him!

The past two weeks I really have not done much around the house. Two weeks ago I made a mess in our living area with me dragging all sorts of stuff from my scrapbook room to the dining room and kitchen. Piles and stacks of stuff everywhere. I spent almost one full week pulling stuff, taking pics, listing items on my Facebook yardsale page, and then the numerous trips to the post office getting it all mailed out promptly. Then this past week both me and my Baby Grand were sick with a cold, cough, and low grade fever. I think we are now on the mend. Both of us have the residual, annoying cough. But, at this point we know it's on it's way out and we will be back to running at full speed soon. Tonight I had everyone over for dinner. It is always too crazy on Valentine's Day to even think about eating out, plus we all enjoy and prefer a meal at home anyway. But with my house being a wreck, I had to do some cleaning along with the cooking. Also, I let Valentine's Day sneek up on me and I had not taken the time to make Rick's card yet. So, with my Baby Grand here today, we had a very busy and full day together.

I really had no idea or clue on where to start with Rick's card, but I knew I had a long list of chores waiting to be tackled today too and I had to get moving. My priority was making the card. It was Valentine's Day and a day we love to celebrate, so after breakfast I got busy. I used this paper for my stamping. I love PaperTrey Inks papers.Their white "paper basics" is perfect to use with Copic markers. A really nice, smooth, thick cardstock. I have never been disappointed in using it. For my papers I used a retired paper collection from Stampin Up called Love Letters. I totally love these papers and have a nice stash saved. There is not a paper in this collection that I don't love. Here is a pic of the wonderful patterns. My card base and matt layers are Red Riding Hood also from Stampin Up.


For my card I chose two of the stamps I recently bought at the Rubber Stamp Show that was here in Mesquite Texas in January. For my image I used the Sweet Cowgirl stamp from Young Rebel's. With us just moving from Alabama to Texas this past year, I loved the effect of the herringbone DSP along with this adorable little cowgirl. For my sentiment I used a verse from Stampamania.com. I loved these two stamps together.

 
Being in such a hurry today, I did not take the time with any shading when coloring the image using my Copic markers. I felt lucky that the card came together as quickly as it did and just moved on, but I was still pleased with how it turned out.
 
My friend Ray Waxman is a Stampin Up Demonstrator and I ordered from her the framelits dies that I used to cut my stamped image. I am a huge Spellbinder buyer and user. I think it is wonderful that more companies are getting competitive and marketing similiar products to the Spellbinder dies. This was my first time using these dies and I just loved them! From there I inked my edges, used pop dots to accent the layers, matted my verse, and called it a day.  
 
 
ENJOY!
 

Tuesday, February 12, 2013

My Second "Scrap & Dash"

I went to my second "Scrap & Dash" at Scrapper's Boutique on Saturday. Alex, my twelve year old Grand was able to attend too. It was a joy to have her with me scrappin. My five year old Baby Grand begged to go too. She was so sad and upset when her Gamma told her children couldn't go until they turned ten. Hoping one of our local scrapbook stores will have a young children's class this summer.

Susan Liles, who designed this weeks page sent everyone a "hint" that it was going to be a western page. I was sooooo excited about this idea. I have been wanting to do a mini album on our recent move from Alabama to Texas, but didn't know where to start. It has been almost one year since I have done anything other than making cards. I felt kind of rusty with the thought process! We arrived for class and was totally amazed on what an adorable, cute page Susan had created. I just loved it! Everyone was excited and most of the ladies bought an extra page kit to make a double 12" x 12' scrapbook page. This was such a nice page to make. I am so impressed with Susan's work. A very creative gal.


This is not the best pic. Not sure how anyone takes pics of their cards or pages. My lighting is never great taking pics. Oh well. Hopefully you can see the full image of the double page. I have been cloud nine crazy over this layout all week!
 

Here is the left page. She only created one page for our class, but I wanted a double page layout and so I came up with this page. I tried to have the theme flow from one page to the other.
 

Again, not a great pic. Hoping you can click on each pic to get a more close up view. I am just loving making these pages each week. Don't know if I mentioned it, but I really LOVED making these two pages!! LOL


Monday, February 4, 2013

Valentine Page

Initially when I moved here the end of September, my priority and main goal was to unpack. I spent weeks doing that and got everything but a few boxes done. Then we went back for our second and last load in December and filled the garage up again. Most of the stuff from our second trip was both garage and attic items, so not much we need or can do anything with until it warms up. Once we can open the garage door and have more space to move things around a bit and maybe have a garage sale, we can get things better organized. I know Spring is coming, but for now I am so tired of seeing boxes piled up and no room to park our cars.

It is nice to have life settle down some too. I am slowly discovering the scrapping world of Fort Worth and meeting some wonderful, sweet new friends. This past Saturday I went to my first "Scrap & Dash" at https://www.facebook.com/pages/Scrappers-Boutique with my new friend Patti. It is held every Saturday and is on a first come, first serve basis. I would guess she has room for ten scrappers around four tables. This week there were eight of us. Each week she puts out a small rack filled with a new paper collection, a displayed completed 12 x 12 page, individual written instructions, and from there you and your scrappin buddies cut the pieces needed and make your own page. This was both Pattie's and my first time to attend, and we had a blast. The first page I have made in almost one year! Really looking forward to returning this weekend.

This is the example from the store. I never realized there were five 2" x 2' squares along the bottom and I only cut four. Not sure where my eyes were! My page is not 100% as the example because of not having the right type of glue at home where I finished the pages.
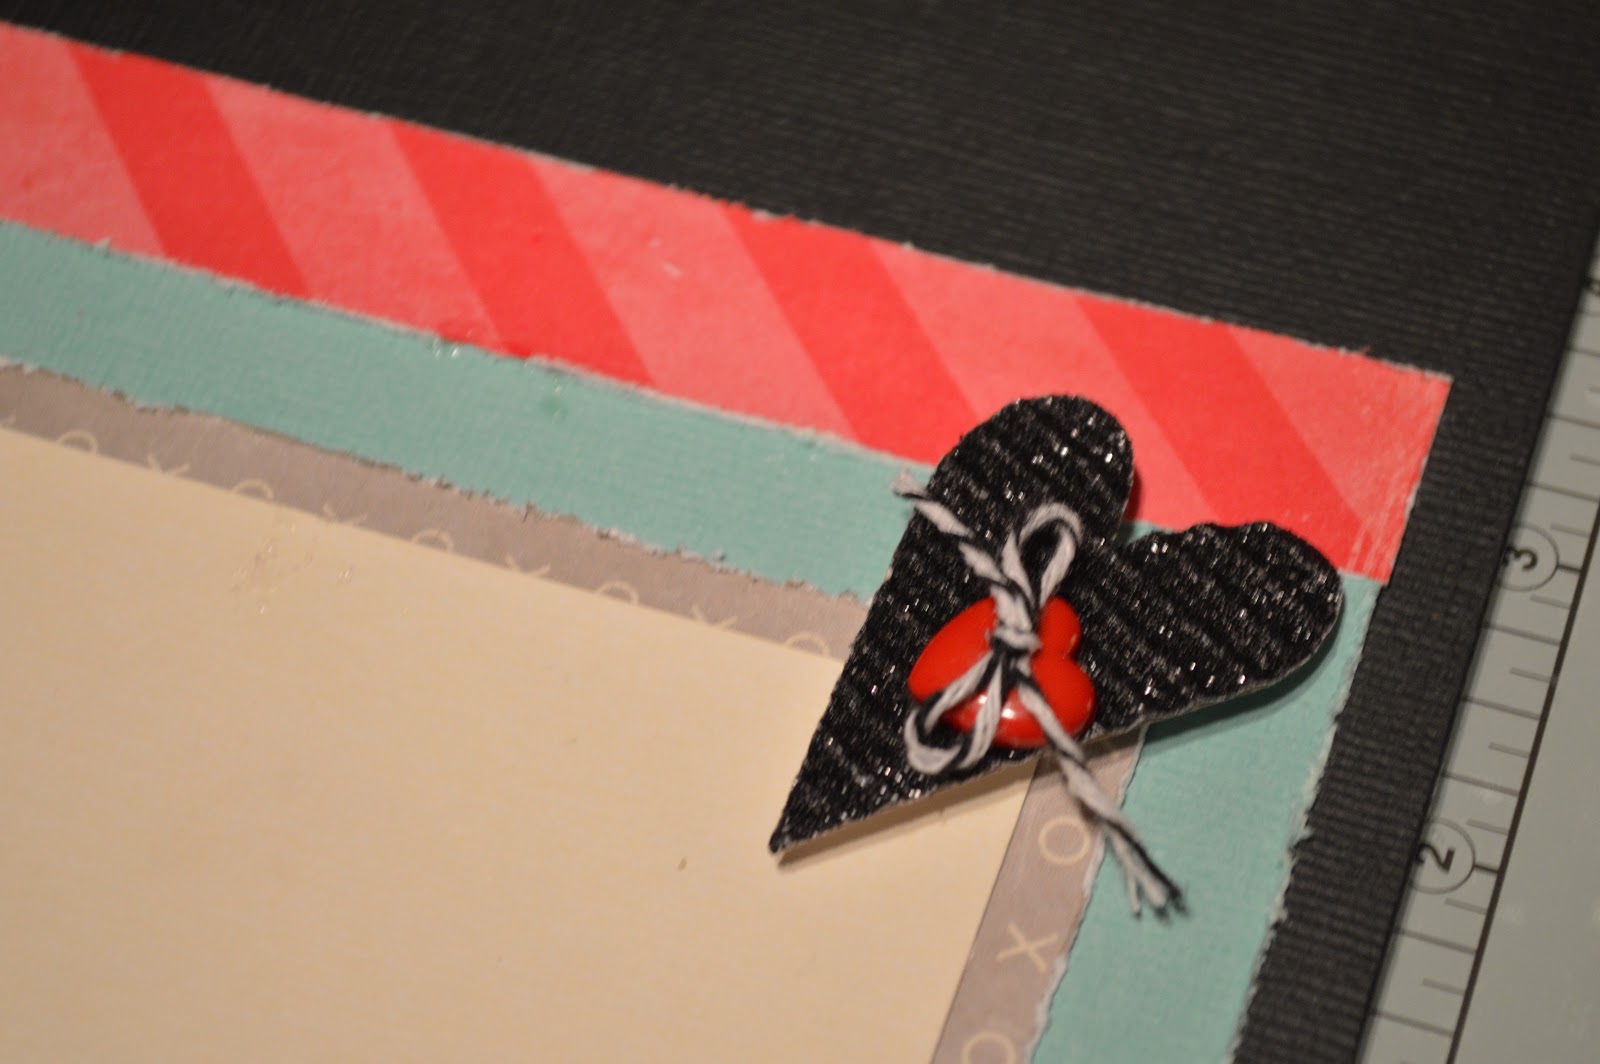
I really loved the colors on this page. I would never have thought to use aqua blue along with the reds and pinks on a Valentine page, but it worked beautiful. Then the gray and black both compliment each other.

I distressed my edges. It sure took a long time to get two seperate pages done. I ended up buying two page kits. One for each Grand. 

 I had more empty space along the bottom because I only had four squares, so I added some twine. I also ended up adding my letters in a different space than the example. I struggled with trying to adhere letters to the black lace. My glue did not like the fabric lace. I had more glue on my finger tips than the ribbon and chipboard. 


This is my finished page. I am really excited about attending this fun class each week. I was wanting to do some type of  "2013 in Review" album for each Grand this year. If these pages cover every Holiday for the year, I might be able to get it done!


Saturday, January 26, 2013

Studio J

Want to get your Christmas pictures off your camera and scrapped? It's easy to do at your own pace, in the privacy of your own home. Using our free Close To My Heart Design Software, with just a few clicks, you can have a whole album completed. Here is a recent video from CTMH showing you how easy it is!
http://www.youtube.com/watch?v=yaajTQtA-lI

Friday, January 25, 2013

I WON!! YIPPEE

My new Texas scrappin buddy Danna just emailing me saying I won one of the new 2013 CHA prizes over at The Little Blue House here in Keller. I couldn't believe it. I rushed over to their blog and there was my name. Yippee! I won a new Tim Holtz stamp set! Oh boy...oh boy! I was just telling Cathy, my friend in Maine, that I never win anything and she said "enter, enter, and enter." Gosh.....looks like I know where I will be going tomorrow in between visiting the Rubber Stamp Show in Mesquite and then attending my local crop here in Hurst. Oh man....I am tickled pink! Thank you Tracy!!
http://www.thelittlebluehouseblog.blogspot.com/2013/01/winnersand-more.html